Module 1: Introduction to advancing in options
In 'Advancing in options', we go into the detail of option pricing, and discuss how to implement and manage advanced option strategies, before taking an in-depth look at several of these strategies.
Module 1: Introduction to advancing in options
In 'Advancing in options', we go into the detail of option pricing, and discuss how to implement and manage advanced option strategies, before taking an in-depth look at several of these strategies.
This course builds on ASX's 'Introduction to Options' course.
In 'Advancing in options', we go into the detail of option pricing, and discuss how to implement and manage advanced option strategies, before taking an in-depth look at several of these strategies.
'Introduction to Options' covers the basics of options and option pricing, and introduces the strategies of buying call and put options, and writing calls over your stock.

This is an advanced course.
To get the most out of the course, it is important that you are familiar with the concepts covered in the 'Introduction to Options' course, including:
If you are not comfortable with this material, we encourage you to revise the introductory course.
After completing these modules you should:
The skills and knowledge you acquire from these modules can be applied to any option strategy, not just the strategies covered in this course.
Strategy modules
Modules 5 to 10 are devoted to specific strategies, including:
This is not an exhaustive list of option strategies, but a selection of strategies that suit a range of market outlooks.
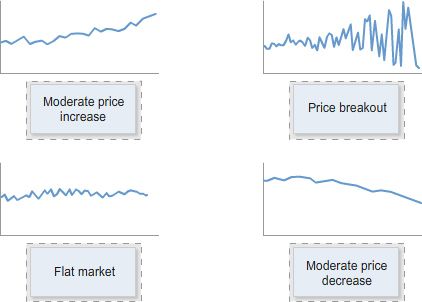

In each strategy module, you will learn:
Most strategies discussed in this course involve more than one 'leg'.
A leg can be an option position or a stock position.
The four basic option positions are:
The two stock positions are:
These basic positions are the building blocks of all option strategies.
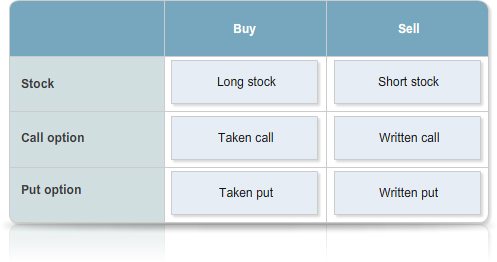
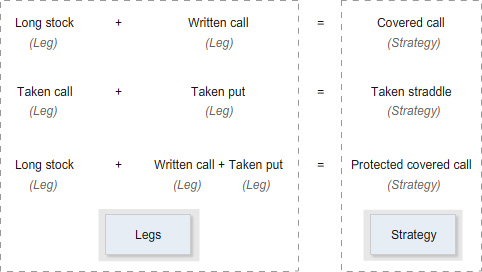
A multi-legged strategy is one that includes two or more of these legs.
Multi-legged strategies are often described using terminology such as 'straddle', 'strangle' or 'spread'. These terms will be explained in later modules.
For example, the covered call comprises a stock leg and an option leg:
The taken straddle comprises two option legs:
A broad, directional view can generally be traded using a basic option strategy.
For a more targeted view, a more advanced strategy may be required.
Multi-legged strategies can give effect to a market view that a single option position cannot reflect. By combining two or more legs, you can tailor a strategy to suit almost any market view.
For example, if you are strongly bullish, simply buying a call option may be the most appropriate strategy.
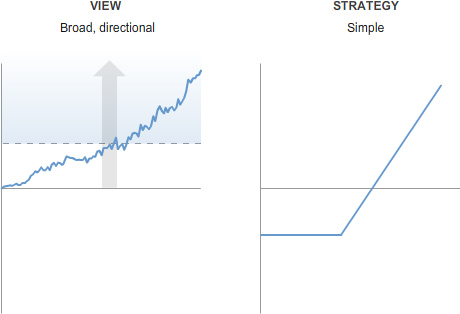
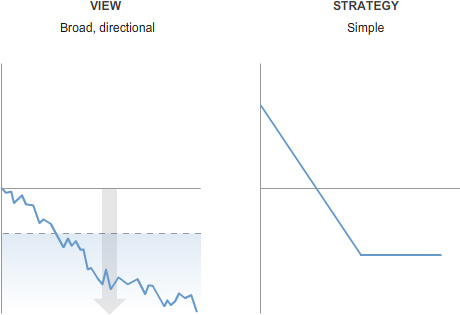
But if your view is only moderately bullish, a bull call spread (consisting of a taken call, and a written call with a higher strike price) may give you a better result if the stock behaves as you expect.
When evaluating a multi-legged strategy, you should look at the strategy as a whole, rather than just considering the legs in isolation.
Your focus should be on the net exposure the strategy provides. Focusing on the component legs individually can give a misleading impression of your exposure.
For example, the bear call spread includes a taken call option. A taken call in isolation is bullish. But the bear call spread, as its name suggests, reflects a view the stock price will fall.
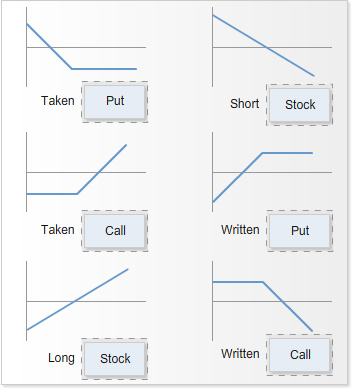
Throughout this course we will use payoff diagrams (also called 'profit and loss profiles') to illustrate the profit and loss potential for an option strategy.
A payoff diagram shows the profit or loss your strategy would make for any given share price at expiry. It also shows the breakeven point(s) for your strategy.
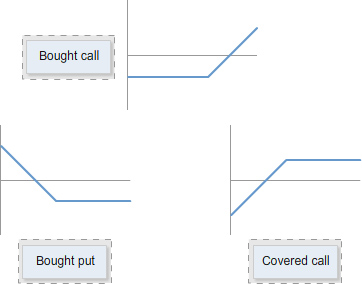
There are four payoff diagrams for the four basic option positions:
There are two payoff diagrams for stock positions:
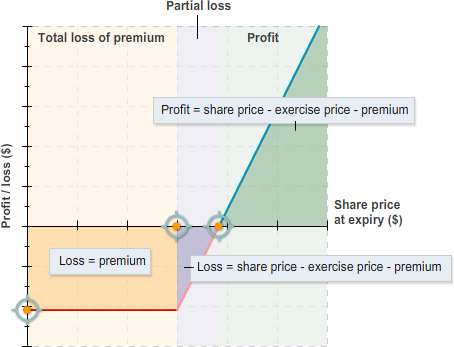
This is a quick refresher of the main parts of the taken call payoff diagram.
The most you can lose when you take a call is the premium you pay. You will make this loss if at expiry the share price is at or below the exercise price.
If the share price is above the exercise price, the option will have intrinsic value. The higher the share price is, the more the option will be worth.
The breakeven point is the exercise price plus the premium paid. At this point, the option is worth what you paid for it.
Above the breakeven point, you will make a profit -the higher the share price, the greater your profit
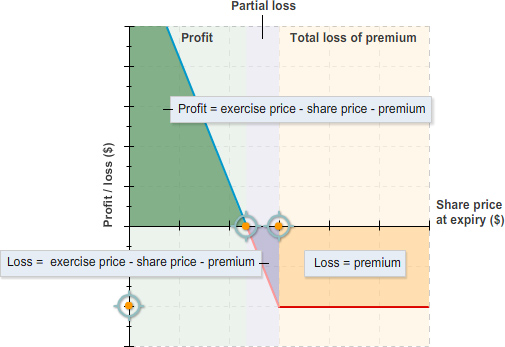
The most you can lose when you buy a put is the premium you paid. You will incur this loss if at expiry the share price is at or above the exercise price.
If the share price is below the exercise price, the put option will have intrinsic value. The lower the share price is, the more the option will be worth.
The breakeven point is the exercise price less the premium paid. At this point, the option is worth what you paid for it.
Below the breakeven, you will make a profit - the lower the share price, the greater your profit.
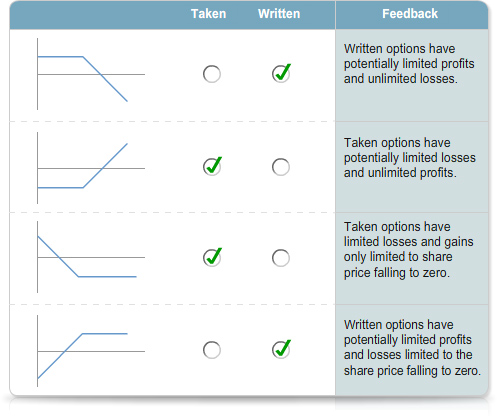
The payoff diagram for a single option position is fairly simple.
It shows the potential profit and loss of the position at expiry.
In each case there is one breakeven point.
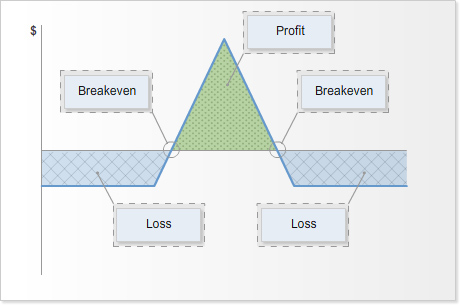
The diagram for a multi-legged strategy may be more complex.
For example, there may be more than one breakeven point.
However, the information the diagram presents is the same - the profit or loss you will make for any given share price at expiry.
The process of interpreting the diagram is the same whether the strategy involves one, two or more legs.
A simple payoff diagram can only show with accuracy your potential profit and loss at expiry.
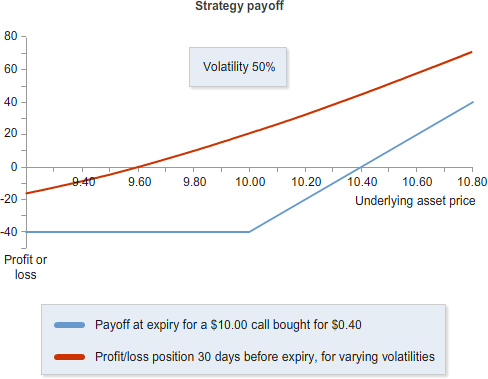
At expiry, an option has only intrinsic value. Given a certain share price, you know what the option will be worth, and therefore what your profit or loss will be.
Before expiry, your option may have time value as well as intrinsic value. Estimating what this time value will be involves assumptions about volatility and other variables.
If you use a payoff diagram to plot your profit and loss for a pre-expiry date, the result will only be as accurate as your assumptions about these variables.
If you use a payoff diagram to plot your profit and loss for a pre-expiry date, the result will only be as accurate as your assumptions about these variables.
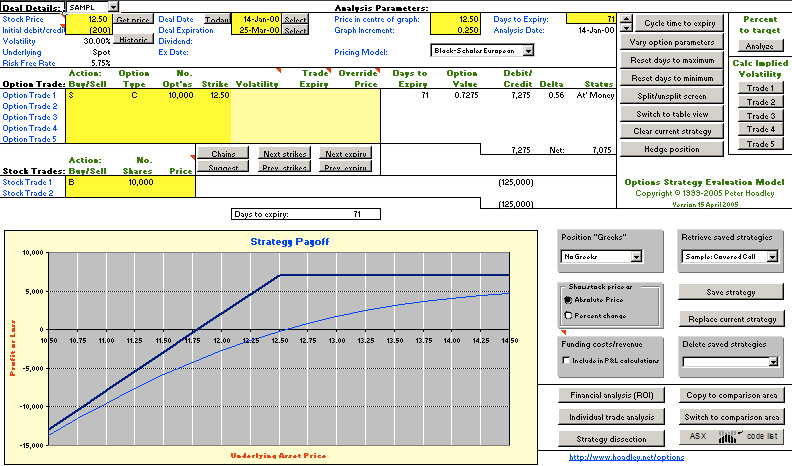
There are many tools available online that plot payoff diagrams.
The 'Strategy Modelling Tool' (for PC) can be downloaded from the ASX website.
As well as plotting payoff diagrams for your position at expiry, both these tools enable you to estimate a pre-expiry profit/loss position based on your assumptions about volatility and other variables.
